As an Amazon Associate, I earn from qualifying purchases. Some links in this article are affiliate links, if you buy through them I may earn a small commission at no extra cost to you.
Quick Summary
- Heirloom vs. Hybrid: Only save seeds from open-pollinated heirlooms; hybrids will not grow true to type.
- Isolation Distances: Space crop varieties apart to prevent cross-pollination and accidental hybrids.
- Selection Criteria: Save seeds from the healthiest, tastiest, and most disease-resistant plants.
- Wet vs. Dry Seeds: Ferment wet seeds (like tomatoes) to remove germination-inhibiting molds.
- Proper Storage: Keep fully dried seeds in airtight containers in a cool, dark, and dry spot.
Saving heirloom seeds is more than gardening; it’s cultivating legacy. Not only does it save you money, but it allows you to select seeds from plants that thrived specifically in your local microclimate, making your garden stronger year after year through natural selection.
Microclimate Mastery
Plants adapt to your specific soil and pests over generations, becoming “local heroes.”
Safeguard Your Seedbank
Improper storage leads to mold or 0% germination. We’ll show you how to avoid it.
Economic Resilience
Break the cycle of buying seeds. One tomato yields enough for your whole neighborhood.
The Golden Rule: Heirloom vs. Hybrid
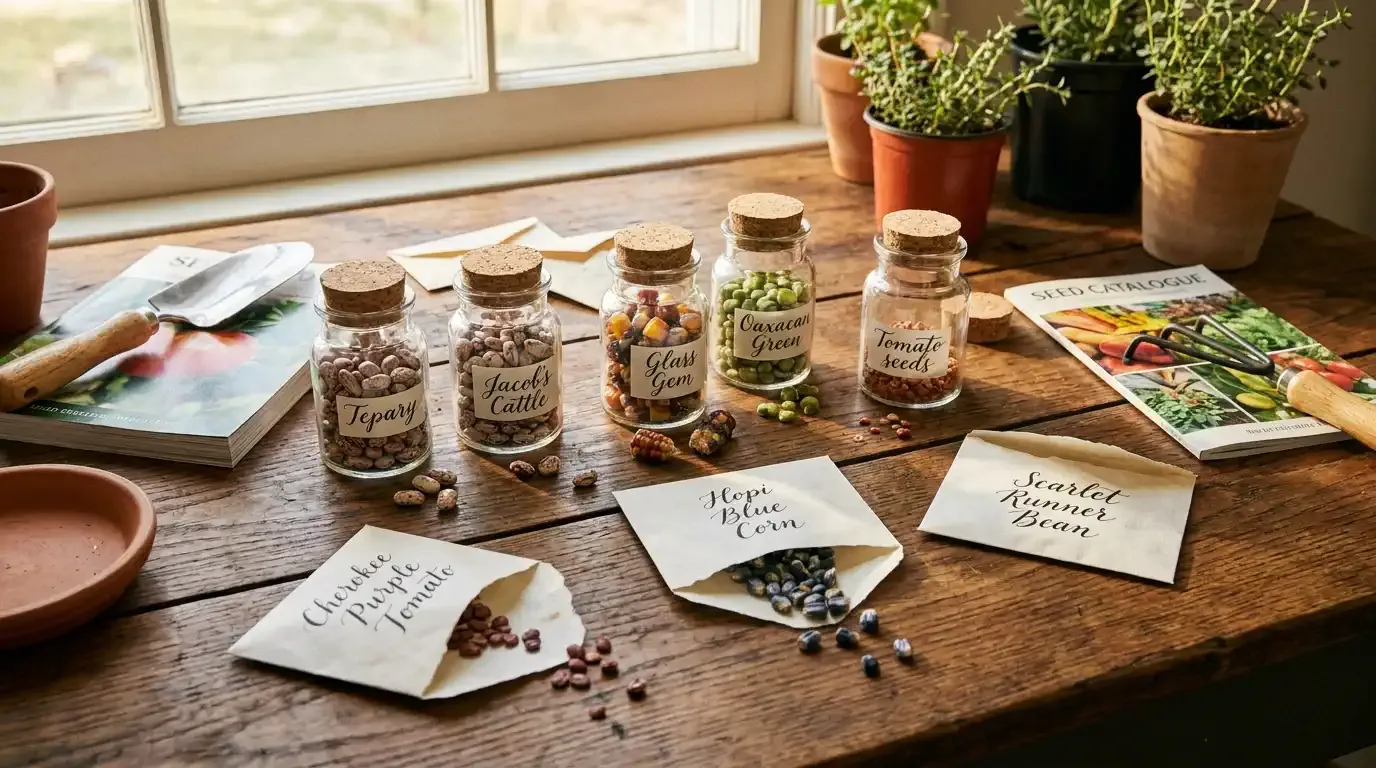
Before you save any seed, check the packet. You can only successfully save seeds from Open-Pollinated (Heirloom) varieties.
- Heirlooms are like family recipes, they stay “true-to-type,” meaning the offspring will look and taste like the parent.
- F1 Hybrids are like a high-performance science experiment. If you save their seeds, the next generation will be a “genetic lottery”, often unpredictable, less productive, or even sterile.
Step 1: Avoiding “Accidental Hybrids”
Plants are social, they love to swap pollen. If you grow two types of squash next to each other, bees will cross-pollinate them, and you’ll end up with a “Franken-squash” next year. To keep your varieties pure, you need Isolation.
Recommended Isolation Distances
How far apart should different varieties of the same species be?
Seed Isolation Distances
Critical distances required between different varieties of the same species to prevent cross-pollination and maintain genetic purity.
| Crop Type | Pollination Method | Distance Level | Safe Isolation Distance |
|---|---|---|---|
| Tomatoes | Self-PollinatingNatural Path | Low | 10–20 feet |
| Beans & Peas | Self-PollinatingNatural Path | Low | 10–20 feet |
| Lettuce | Self-PollinatingNatural Path | Low | 10–20 feet |
| Peppers | Often CrossesNatural Path | Moderate | 100–400 feet |
| Squash & Melons | Highly OutcrossingNatural Path | High | 0.5–1 mile |
| Corn | Wind PollinatedNatural Path | Critical | 1–2 miles |
Maintain this distance to ensure 99.9% genetic variety purity.
Maintain this distance to ensure 99.9% genetic variety purity.
Maintain this distance to ensure 99.9% genetic variety purity.
Maintain this distance to ensure 99.9% genetic variety purity.
Maintain this distance to ensure 99.9% genetic variety purity.
Maintain this distance to ensure 99.9% genetic variety purity.
Note: Isolation distances can be reduced if physical barriers (like greenhouses or isolation bags) or time-based isolation is used. Wind-pollinated crops like corn are the most difficult to isolate in small gardens.
Tip
Small Garden Hack: If you don’t have a mile of space for your squash, just grow one variety of that species per year.
Strength in Numbers (Genetic Health)
Don’t just save seeds from your single favorite plant. To keep the variety strong and healthy, you need to maintain a diverse “gene pool.” This prevents Inbreeding Depression, where plants become smaller, weaker, and less productive over time.
- Self-Pollinators (Peas, Tomatoes): You can get away with saving from 5 to 10 plants.
- Outcrossers (Corn, Squash, Brassicas): Aim for at least 20 to 50 plants to keep the genetics robust.
Step 2: The Art of Selection (Phenotypic Choice)
Genetic stewardship means being a “matchmaker” for your garden’s future. Don’t just save any seed, save the best seeds. Throughout the season, observe your plants and mark your “champions” with a piece of ribbon.
What to Look For:
- Earliness: Which tomato ripened first?
- Resilience: Which cucumber vine didn’t succumb to powdery mildew when the others did?
- Vigor: Which lettuce didn’t bolt (go to seed) during that June heatwave?
- Flavor: Only save seeds from the fruit you actually enjoyed eating!
Important
Avoid the “Late-Season Laggards”: If a plant is sickly or slow, don’t save its seeds. You are essentially “voting” for those weak traits to appear in your garden next year.
Step 3: Know Your Seeds (Processing)
Dry Seed Processing
These seeds mature and dry out naturally on the plant. The goal is to let nature do the majority of the work before you intervene.
Examples
- Beans & Peas
- Lettuce & Brassicas (Broccoli, Kale)
- Most Herbs (Basil, Cilantro)
- Corn
When to Harvest
Wait until pods or seed heads turn brown, brittle, and dry on the plant.
The “Wait and Ripen” Rule for Wet Seeds
For squash, pumpkins, and melons, don’t process the seeds the moment you harvest. Let the fruit sit in a cool, dry place for 3 to 4 weeks after picking. The seeds continue to pull nutrients from the flesh, making them bigger and more viable.
The Tomato Exception
Tomato seeds have a slippery “anti-sprout” coating. We use fermentation to remove it.
The Tomato Exception
Tomato seeds are encased in a gelatinous sac containing germination inhibitors. We use controlled fermentation to break down this coating and destroy seed-borne pathogens.
The Scoop & Slurry
Scoop the seeds and their gelatinous sacs into a clean jar. Add 1/4 cup of non-chlorinated water to create a slurry.
The Bio-Breakdown
Store in a warm spot (70-80°F). A white mold film will form. This biological action digests the seed coating.
The Sinker Selection
Add water and stir. Pour off the "floaters" and pulp. The heavy, viable seeds at the bottom are your gold.
Pro Tip: The Sinker Rule
Always discard seeds that float. Floating indicates they are empty. Heavy "sinkers" have the highest nutrient density and germination rates.
Step 4: The Long Game (Biennial Lifecycles)
Most vegetables are Annuals (they go from seed to seed in one year). However, some of our favorites like carrots, beets, kale, and onions are Biennials. They require a two-year commitment and a process called Vernalization.
- Year One: The plant grows its “storage organ” (the carrot root or the onion bulb).
- The Winter Chill: The plant must experience a cold period (usually below 45°F for several weeks) to trigger its flowering response.
- Year Two: In the spring, the plant “bolts,” sending up a massive flower stalk to produce seeds.
Layman Tip: If you live in a very cold climate, you may need to dig up your carrots in the fall, store them in a box of damp sand in your cellar, and “re-plant” them in the spring to get seeds!
Step 5: The Crucial Drying Phase
The Crucial Drying Phase
Moisture is the absolute nemesis of seed saving. If you store seeds with even a hint of dampness, they will rot or mold. Follow these rules for maximum viability.
No Direct Sun
High heat "cooks" the embryo. Dry in a shaded, room-temp area.
Airflow is King
Use window screens or mesh. Stagnant air is the #1 cause of mold.
No Paper Towels
Seeds stick to paper fibers. Use glass plates or coffee filters.
The 14-Day Rule
Patience pays off. Let them dry for at least 2 weeks before sealing.
The Shatter Test
Don't guess, verify. This simple tactile test is the industry standard for determining if a seed is ready for long-term storage.
Pressure Test
Try to dent the seed coat with your thumbnail.
Sound Test
Dry seeds should sound like small stones when dropped on glass.
Seed Dents
Still Wet • Continue Drying
Seed Shatters
Ready • Seal Immediately
Step 6: Defending Your Stash (Storage)
Once your seeds are dry, you must protect them from the “Three Sleep-Killers”: Heat, Light, and Moisture.
The Three Commandments
- Keep it Cool: A cool basement or the back of your fridge is perfect.
- Keep it Dark: UV light degrades seeds. Use opaque containers or a dark cabinet.
- Keep it Dry: Use glass Mason jars with rubber seals. Plastic bags “breathe” too much.

Garden Seeds Saving Kit
The ultimate seed organizer 'treasure box' for gardeners. Featuring 70 individual airtight screw-top plastic containers secured in a shockproof spongy carrying case, it keeps your seeds dry and shielded from sunlight. Includes 20 seed envelopes, a labeling kit, a dispenser funnel, and tweezers to systematically manage and preserve your seed collection.
Pest Protection 101
Tiny bugs like weevils can eat your seeds from the inside out. Here are two organic ways to stop them:
- The Freezer Trick: Put your dry seeds in the freezer for 3 days. This kills any hidden eggs or larvae. Just let the jar reach room temperature before opening it to avoid condensation.
- Diatomaceous Earth: Mix a tiny pinch of food-grade Diatomaceous Earth into your seed jar. It acts like microscopic glass to bugs but is totally safe for you and your seeds.
Seed Viability Timeline
Average life expectancy of common vegetable seeds. Proper storage is essential to maximize these durations.
Critical Tip: Viability assumes optimal storage conditions (Cool, Dark, Dry). Viability naturally decreases by 10-20% per year even in good conditions. Always perform a germination test for seeds older than 3 years.
Troubleshooting: Why Won’t They Sprout?
If your perfectly saved seeds won’t sprout next year, they might just be in “deep sleep” (dormancy).
- Cold Stratification: Some seeds (like many herbs and perennials) need to “feel winter” before they wake up. Put them in the fridge for 30 days before planting.
- Scarification: Seeds with very hard coats (like some beans) might need a little “scuff” with sandpaper or a soak in warm water to let the moisture in.
Grow Smart, Save Legacy
Gardening is a cycle, and seed saving is the moment that connects one season to the next. By following these steps, you’re not just saving seeds; you’re preserving biodiversity and building a more resilient, personal garden. Happy seed saving!
Frequently Asked Questions
Can I save seeds from store-bought hybrid vegetables?
No, seeds from hybrid (F1) plants are unstable and will either be sterile or produce offspring that look and taste completely different from the parent fruit.
Why do tomato seeds need to be fermented?
Tomato seeds are surrounded by a gel sac that prevents germination. Fermenting them in water for 2-3 days breaks down this sac and kills seed-borne diseases.
Our Amazon Storefront
Browse all our recommended tools & supplies
Everything we personally use and trust — hand-picked for gardeners like you.
I've been running DWC and Kratky systems for several years and write about what actually works, not textbook theory. Follow along for honest product reviews, practical guides, and real grow results.