
As an Amazon Associate, I earn from qualifying purchases. Some links in this article are affiliate links, if you buy through them I may earn a small commission at no extra cost to you.
Quick Summary
- Hydroponic Chamomile: Grow Roman or German chamomile from seed to harvest in 60 to 90 days.
- System Choice: Use Deep Water Culture (DWC) or Ebb and Flow systems for maximum root health.
- Water Chemistry: Maintain nutrient pH between 5.6 and 6.2, and keep EC levels low (0.8 to 1.2).
- Light Cycle: Provide 14-16 hours of daily full-spectrum light to encourage heavy flower production.
- Harvesting Tips: Pick flowers when the white petals lie flat or begin to reflex backwards.
Chamomile is a beloved herb known for its calming properties, delicate flowers, and versatility in teas, skincare, and aromatherapy. Growing hydroponic chamomile is an incredibly rewarding process, but doing it successfully requires moving past generic textbook instructions and looking at what actually works in a real setup.
Editor’s Note: Parts of this guide were structured and optimized with the assistance of AI, then thoroughly reviewed, edited, and expanded with first-hand growing experience by our author Raymond to ensure practical, real-world accuracy.
Quick Grow Stats
| Statistic | Requirement |
|---|---|
| Germination Time | 7–14 Days |
| EC Range | 1.0–1.6 |
| pH Range | 5.5–6.5 |
| Ideal Temperature | 65°F–75°F (18°C–24°C) |
| Time to Harvest | 60–90 Days |
What I Learned From My First Chamomile Grow
When I first tried growing German chamomile in a DWC bucket, I treated it like basil and loaded the nutrient solution to an EC of 2.0. The result was a massive, bushy green plant that smelled like grass and produced exactly zero flowers.
For my second attempt, I dialed the EC back to 1.2 and kept the temperature around 70°F. The seeds sprouted in 9 days in rockwool plugs under a dome, and by day 65, the net pot was overflowing with healthy white roots and a dense cover of daisy-like blossoms. I also learned that Roman chamomile grows too low and behaves like a carpet, making it a nightmare for standard net pots. Make sure you stick to German Chamomile (Matricaria recutita) for your DWC or NFT setups!
Step 1: Choose the Right Chamomile Variety and Hydroponic System
Before planting, you must select the correct variety. German chamomile (Matricaria recutita) is an upright annual that is prized for its abundant, aromatic blooms, making it the perfect choice for hydroponic systems. Roman chamomile (Chamaemelum nobile) is a low-growing perennial ground cover that tends to crawl and spread laterally, which makes it highly impractical for net pots.
For your hydroponic system, you have three primary options:
- Deep Water Culture (DWC): Keeps roots submerged in nutrient-rich, aerated water. This is the gold standard for single plants or small herb gardens because it’s incredibly stable and easy to maintain.
- Nutrient Film Technique (NFT): Circulates a thin stream of nutrients over the roots. Best for larger vertical setups where you want to grow multiple herbs simultaneously.
- Countertop DWC Systems: Compact, all-in-one smart gardens that combine a reservoir with built-in LED grow lights. Perfect for kitchen counters and beginner growers.

German Chamomile Seeds
I've tried three brands, and this seed pack from Sow Right Seeds germinates the most consistently. It features non-GMO heirloom seeds that sprout quickly, making them ideal for indoor grow setups where space and predictability matter.
Step 2: Germinating Chamomile Seeds
Chamomile seeds are tiny and require light to trigger germination. If you bury them, they will rot in the substrate.
- Pre-Moisten Rockwool Plugs: Soak your rockwool plugs in water adjusted to a pH of 5.5.
- Surface Sow: Drop 3–5 chamomile seeds directly onto the top surface of each rockwool plug. Do not cover them with clay pebbles or vermiculite.
- Humidity and Warmth: Place the plugs in a germination tray under a humidity dome. Keep the temperature between 65–75°F (18–24°C).
- Light Exposure: Provide low-intensity light immediately. The seeds will sprout within 7 to 14 days.

Step 3: Transplanting and System Setup
Once your seedlings are about 1 to 2 inches tall and you see white roots beginning to push through the sides of the rockwool plugs, they are ready to transplant.
- Place in Net Pots: Gently position the rockwool plug in the center of a net pot (typically 2-inch or 3-inch sizes work best).
- Secure with LECA: Fill the remaining space around the plug with expanded clay pebbles (LECA). The LECA provides physical support to hold the plant upright.
- Establish the Water Level: Initially, fill your reservoir so the nutrient-rich water just touches the very bottom of the net pot. This allows the LECA to wick moisture up to the rockwool plug.
- Create the Air Gap: Once the roots grow through the bottom of the net pot and dangle directly into the water, drop the reservoir level by 1 to 2 inches. This creates a critical, highly oxygenated air gap that prevents stem rot and root rot.
Step 4: Nutrients, pH, and Light Management
Chamomile has unique feeding preferences. If you give it too much food, it will prioritize green leaves over essential oil production, resulting in tasteless flowers.
Nutrient and Fertilizer Balance
Unlike soil gardening, where chamomile is often left to fend for itself in poor soil, a hydroponic system relies entirely on the nutrient solution as its fertilizer. You must feed the plant, but keep it light.
- EC Range: Maintain the Electrical Conductivity (EC) strictly between 1.0 and 1.6 (500 to 800 PPM).
- N-P-K Ratio: Use a balanced, light hydroponic nutrient formula. Avoid high-nitrogen fertilizers which force leggy, vegetative growth.
pH Management
Keep your reservoir’s pH strictly between 5.5 and 6.5. If the pH rises too high (above 6.8), chamomile will experience nutrient lockout, leading to chlorosis (yellowing leaves) due to a lack of iron absorption.
Light Duration
Provide 12 to 16 hours of full-spectrum light per day using LED grow lights. If you grow chamomile indoors on a standard windowsill, it will struggle to get enough light intensity to trigger flowering and will become tall, spindly, and weak.

Step 5: Pruning, Caring, and Pest Control
Chamomile is generally low-maintenance, but active canopy management increases your flower yields.
- Pinching Back: When the plants reach 6 inches in height, pinch off the top growing tips. This encourages lateral branching and results in a bushier canopy with far more flower buds.
- Air Circulation: Run a small fan to keep air moving around the foliage. Good air circulation prevents powdery mildew and spider mites.
- Pest Control: While generally pest-resistant, aphids and thrips can occasionally invade indoor gardens. Treat them early with organic insecticidal soap. Never spray chemicals directly onto open flowers that you plan to harvest for tea.
- Root Health: Regularly lift the net pot to inspect the roots. They should be bright white. If they turn brown, slimy, and emit a swampy smell, you are dealing with root rot, which is often caused by water temperatures exceeding 75°F (24°C). If this occurs, clean the system with diluted hydrogen peroxide and add a stronger air stone.
Step 6: Harvesting and Drying Chamomile
Your chamomile flowers are ready to harvest when the white petals lie flat and the yellow centers are swollen and bright.
- Timing: Harvest in the morning when the flower’s essential oil concentration is at its highest.
- Method: Gently pinch off the flower head at the base of the stem using your fingers or small pruning scissors.
- Drying: Lay the harvested flowers in a single layer on a mesh drying tray. Place the tray in a cool, dark, and well-ventilated room.
- Storage: Once the flowers are completely dry and feel papery to the touch (usually 7 to 10 days), store them in an airtight glass jar away from direct sunlight.

Benefits of Hydroponic Chamomile
Growing chamomile in a soil-free environment offers several distinct advantages:
- Water Efficiency: Hydroponics uses up to 90% less water than traditional soil-based gardening due to recirculating reservoirs.
- No Soil Contaminants: Eliminating soil prevents common dirt-borne pests, weeds, and contaminants from affecting your tea flowers.
- Higher Potency: Controlled environmental conditions and nutrient levels maximize the concentrations of relaxing essential oils (such as chamazulene) within the flower heads.
Troubleshooting Common Issues
- Yellowing Leaves (Chlorosis): Typically caused by iron lockout. Check your pH pen calibration and ensure your reservoir is adjusted back to the 5.5–6.5 range.
- Spindly, Leggy Stems: The plant is reaching for light. Move your LED grow lights closer to the canopy (12–18 inches) or increase the light duration to 16 hours.
- Mold on Seedlings: High humidity or poor airflow. Remove the humidity dome as soon as seeds germinate and ensure good air movement.
Recommended Gear for Growing Hydroponic Chamomile
To get the most out of your chamomile grow, here are the tools and accessories I recommend:

Indoor Garden Hydroponics Growing System
If you'd rather skip the DIY and get growing immediately, this kit includes everything you need: pods, nutrient solution, a grow light, and a pump. I'd recommend it for anyone who wants to test hydroponics before committing to a larger build. The pod count is generous for the price, and setup takes under 30 minutes. Just add seeds.

VIVOSUN LumaLight 100W LED Grow Light
If you are building your own DWC bucket or NFT system, you need a high-quality light source. This 100W LED light delivers full-spectrum light that mimics natural sunlight, ensuring your chamomile gets the intensity required to produce heavy blooms.
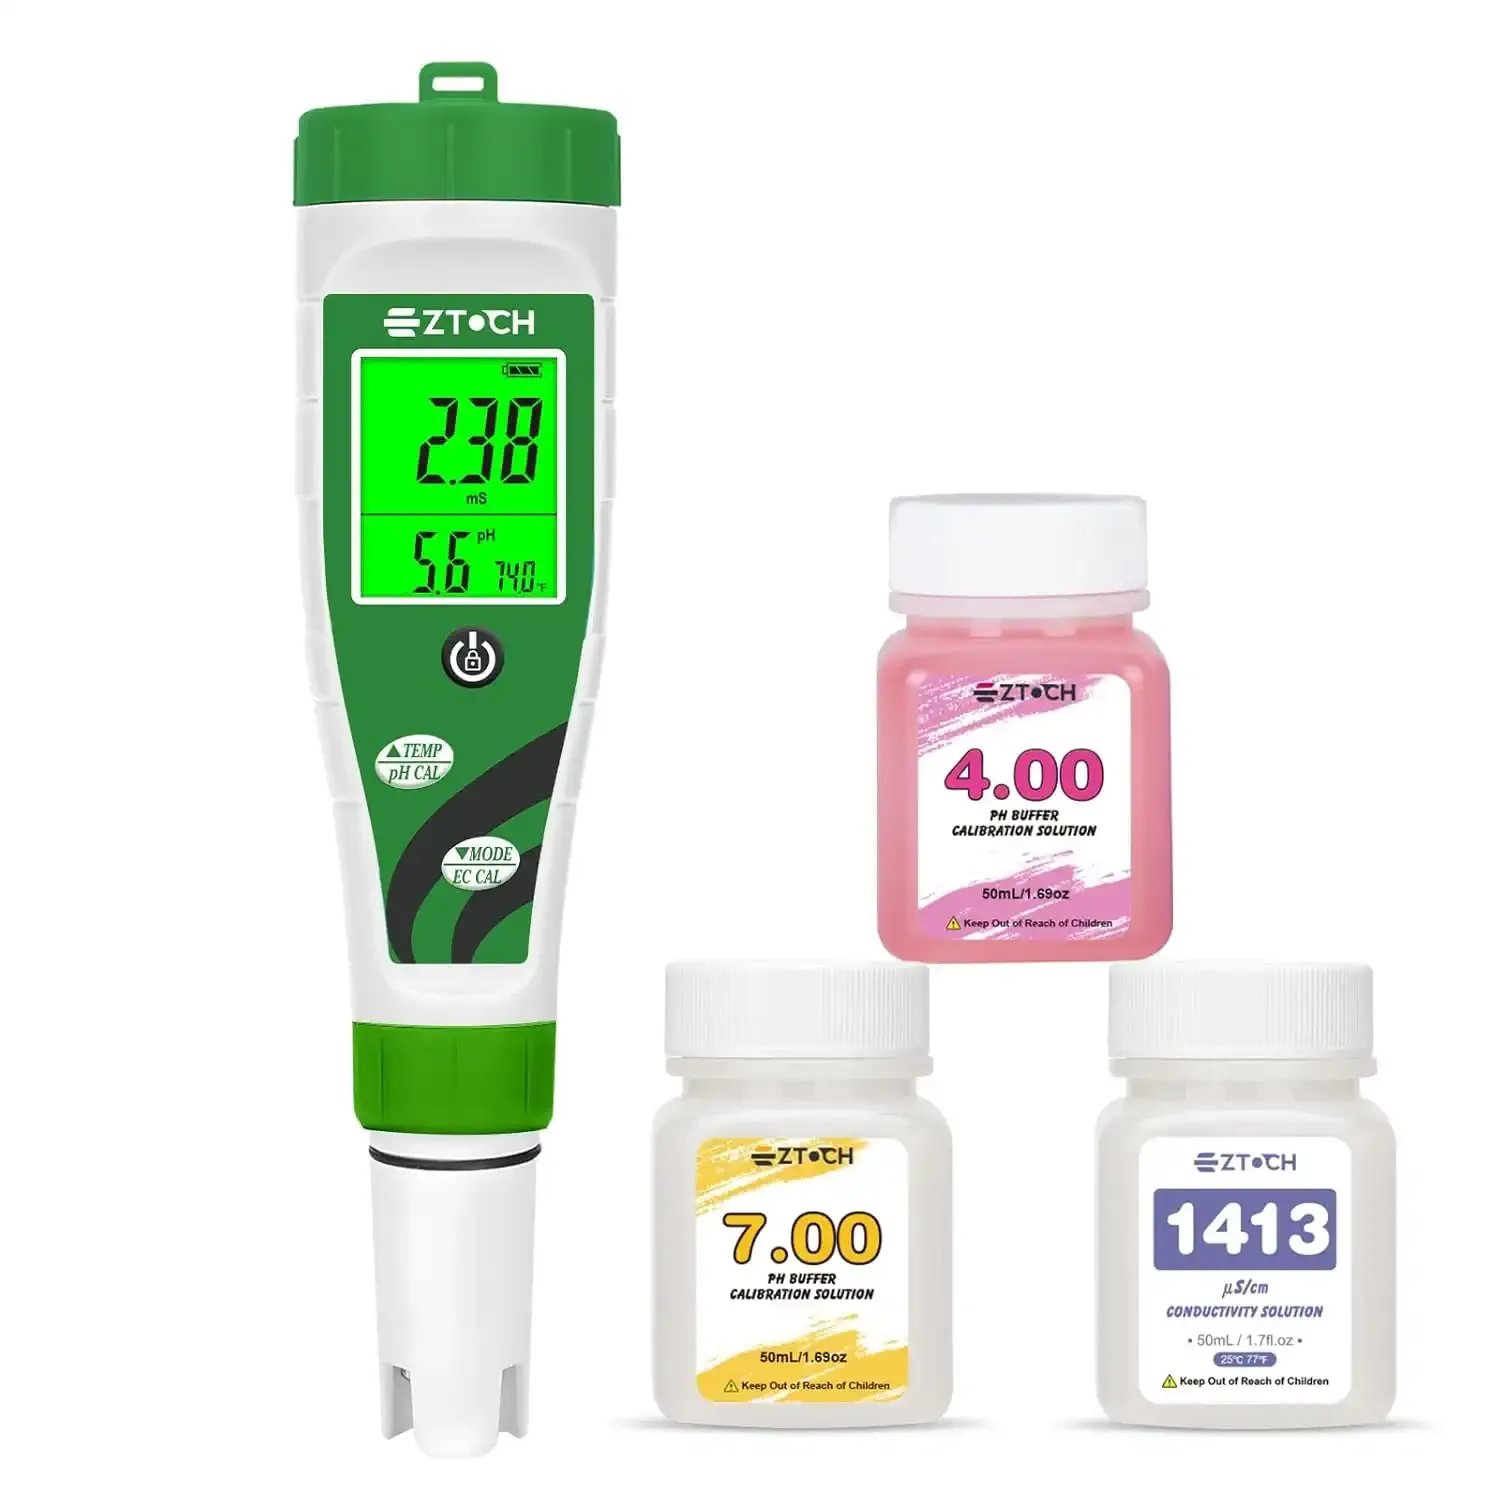
pH and EC Combo Meter Pen
You can't grow healthy hydroponics blind. This digital combo pen measures both pH and EC in seconds, helping you keep your chamomile in the sweet spot of 5.5-6.5 pH and 1.0-1.6 EC.
Conclusion
Growing chamomile hydroponically is a satisfying way to cultivate your own natural remedy for relaxation and sleep. By selecting the right German variety, germinating surface-sowed seeds under direct light, and feeding a light nutrient solution, you can secure a year-round harvest of fragrant, sweet blossoms. Ditch the soil, dial in your EC levels, and start brewing your own home-grown chamomile tea.
Frequently Asked Questions
How long does it take to grow chamomile hydroponically?
Chamomile grows rapidly in hydroponics, typically reaching first flower harvest in 60 to 90 days from germination.
What is the best pH and EC range for hydroponic chamomile?
Keep your pH between 5.6 and 6.2, and keep the EC levels relatively low (0.8 to 1.2) to prevent nutrient burn on delicate chamomile roots.
Our Amazon Storefront
Browse all our recommended tools & supplies
Everything we personally use and trust — hand-picked for gardeners like you.
I've been running DWC and Kratky systems for several years and write about what actually works, not textbook theory. Follow along for honest product reviews, practical guides, and real grow results.