As an Amazon Associate, I earn from qualifying purchases. Some links in this article are affiliate links, if you buy through them I may earn a small commission at no extra cost to you.
Quick Summary
- Choose the Right Medium: Use structural soilless plugs like rockwool, starter plugsView on Amazon, or peat pellets that fit neatly into standard net cups.
- Buffer & pH-Balance: Pre-soak your starter medium in clean water adjusted to pH 5.5–6.0 so delicate emerging taproots aren’t shocked by alkaline conditions.
- Sow & Cover: Plant 2–3 seeds per plug at a depth of roughly twice the seed width, and cover with a humidity dome to hold 70–80°F warmth and moisture.
- Light & Airflow Immediately: Turn on full-spectrum LED grow lights for 14–16 hours daily as soon as green shoots emerge, and add gentle airflow to prevent leggy stems.
- Transplant on Cue: Move seedlings into your active hydroponic system once roots extend through the bottom of the plug and the first true leaves unfold.
Germinating seeds for hydroponics is the process of sprouting seeds in a sterile, soilless medium using controlled moisture and temperature before transplanting them into an active system. In garden soil, dirt buffers minor swings in moisture and pH. In hydroponics, seeds start in a sterile medium where moisture levels, oxygen availability, and root zone chemistry directly dictate seedling vigor.
Starting with vigorous seedlings sets the pace for your entire grow, whether you run Deep Water Culture (DWC), Kratky jars, or Nutrient Film Technique (NFT) channels. This step-by-step workflow covers how to germinate seeds reliably in soilless media and transplant them into an active reservoir without transplant shock.
Step 1: Selecting and Testing Seed Quality
Start with clean, high-vigor seeds suited for indoor cultivation. While almost any vegetable seed can grow hydroponically, fast-growing leafy greens, culinary herbs, and compact fruiting varieties adapt quickest to soilless setups.
Tip
Pelleted vs. Raw Seeds: For tiny seeds like butterhead lettuce or carrots, look for pelleted seeds coated in inert clay. They are dramatically easier to handle with tweezers and drop cleanly into the center of germination plugs without sticking to damp fingers.
If you are working with seed packets from previous seasons, perform a quick viability test before committing your nursery space:
- Place 10 seeds between two damp paper towels inside a sealed zip-top bag at 75°F (24°C).
- Check sprouting numbers after 5 to 7 days.
- If fewer than 7 out of 10 seeds sprout (under a 70% germination rate), sow heavier per plug or replace the seed stock entirely.
If you are still deciding which crops to grow first, explore our guide to the best hydroponic plants for beginners for reliable greens and herbs that germinate rapidly.
Step 2: Choosing Your Soilless Germination Medium
Your germination medium holds the seed in place, retains moisture during sprouting, and anchors the young plant inside your net cup. Because garden soil contains pathogens and clogs hydroponic reservoirs, you must use an inert, structural starter medium.
Comparing Hydroponic Germination Mediums
| Medium | Air-to-Water Ratio | Pre-Soak / Buffering Needed? | Handling & Net Cup Fit | Best For |
|---|---|---|---|---|
| Rockwool CubesView on Amazon | Exceptional | Yes (Soak at pH 5.5 to lower natural alkalinity) | Rigid square shape holds perfectly in net cups | Commercial growers & precision setups |
| Organic Starter PlugsView on Amazon | Excellent | No (Pre-buffered & ready out of the bag) | Spongy texture; excellent 1:1 rockwool substitute | Growers wanting organic, hassle-free plugs |
| Peat PelletsView on Amazon | Very Good | No (Expand in warm water in 5 minutes) | Cylindrical mesh holds roots securely | Beginners & budget-conscious home growers |
| Loose Coco CoirView on Amazon | Good | Recommended (Rinse out fine dust & excess salts) | Requires a net cup liner or clay pebble cap | Bulk germinating & drip irrigation systems |
| Paper Towel Method | Moderate | No | Poor (Requires delicate manual transplanting) | Viability testing old seeds only |
Each medium has trade-offs. Rockwool delivers unmatched aeration but requires handling dry mineral fibers and adjusting high initial pH. Organic starter Rapid Rooting PlugsView on Amazon offer the same rigid structure and clean net-cup fit without mineral fibers or overnight pH buffering.
If you have decided against using mineral wool, read our dedicated guide on how to germinate seeds for hydroponics without rockwool for an in-depth breakdown of organic alternatives.
Step 3: Pre-Soaking and pH-Buffering the Medium
Unprepared media are one of the most frequent causes of stunted hydroponic seedlings. Emerging taproots are exceptionally sensitive to alkaline water and chemical shock.
- Buffering Rockwool Cubes: Raw rockwool carries residual lime that elevates pH above 8.0. Submerge your cubes for 1 to 2 hours in clean water adjusted to pH 5.5–6.0. Shake off excess water gently without squeezing the cubes. Crushing mineral fibers permanently destroys internal air pockets.
- Preparing Organic Plugs & Peat Pellets: Moisten plugs or pellets with dechlorinated tap water or filtered water balanced to pH 5.8–6.2. They should feel heavy and damp like a wrung-out sponge, never dripping wet.
If you are brand new to managing pH, water hardness, and nutrient chemistry, check out our comprehensive overview of hydroponics for beginners to master foundational water chemistry before sowing.
Step 4: Sowing Depth and Multi-Seeding Strategy
Planting depth controls how easily the seed coat sheds during emergence. A general rule for hydroponic sowing is to plant seeds at a depth equal to twice their width.
- Multi-Seed Redundancy: Place 2 to 3 seeds into each starter hole. Even high-grade seeds have natural germination variance, and multi-seeding ensures every net cup in your system receives a vigorous plant.
- Proper Covering: For small seeds like lettuce, basil, or arugula, place them barely 1/8 inch below the surface and pinch the top fibers of the plug closed over the hole. For larger seeds like cucumbers or squash, press them 1/4 inch deep.
- Light-Sensitive Seeds: Note whether your seed variety requires darkness or light to sprout. Lettuce seeds require light cues to break dormancy; do not bury them deeply.
Step 5: Dialing in the Microclimate (Temperature & Moisture)
Seeds do not need fertilizer to germinate; they rely entirely on internal starch reserves triggered by warmth, moisture, and oxygen.
The 4-Layer Germination Microclimate
Hydroponic seeds sprout fastest when all four environmental layers work in unison to balance moisture, root-zone warmth, and ambient humidity.
Propagation Tray
Flat 10x20 nursery tray holding plugs level above standing water to prevent root suffocation.
pH-Balanced Plugs
Starter plugs pre-soaked at pH 5.5–6.0 to protect delicate radicles from alkaline water shock.
70–80°F Heat Mat
Bottom warmth underneath the tray accelerates enzyme activity and cuts sprouting time in half.
Humidity Dome
Transparent dome trapping ambient moisture until green cotyledons emerge, then removed.
Critical Trigger: Remove the humidity dome immediately once sprouts open their first seed leaves to prevent damping-off.
- Optimal Temperature: Maintain a steady root-zone temperature between 70°F and 80°F (21°C–27°C). Ambient temperatures below 65°F delay sprouting and leave seeds vulnerable to rot. If your growing area is cool, place your propagation tray on a seedling heat mat.
- Humidity Management: Cover your tray with a transparent humidity dome to maintain 70%–80% relative humidity. This keeps the upper rim of your starter plugs from drying out before taproots penetrate downward.
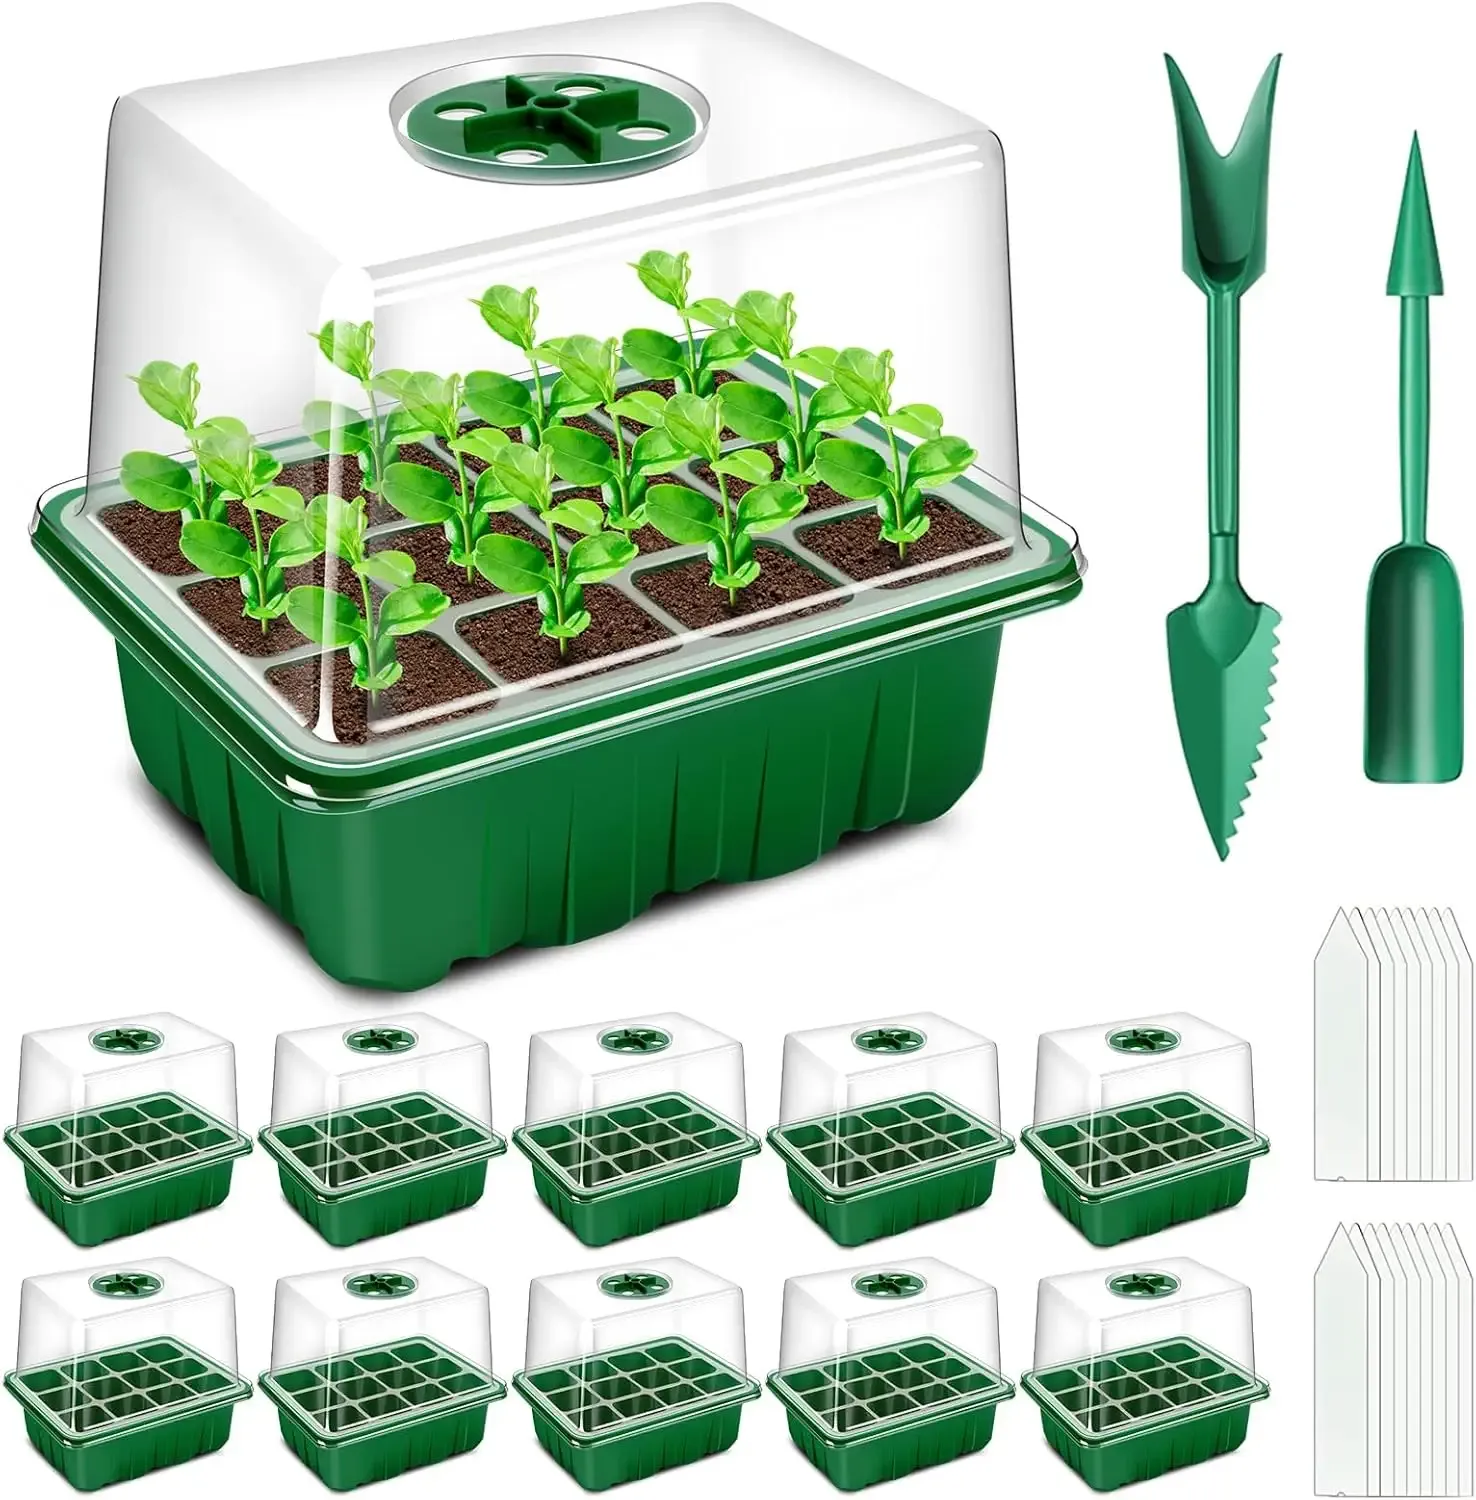
Seed Starting Trays (10-Pack, 120 Cells)
This heavy-duty nursery tray bundle includes clear humidity domes and adjustable vents, making it easy to lock in the 70–80% relative humidity needed for early root development without waterlogging your starter plugs.
Warning
Avoid Soggy Mediums: Do not let starter plugs sit submerged in standing water inside your tray. Waterlogged plugs suffocate seeds and invite Pythium (root rot) before the plant emerges.
Step 6: Lighting Timing & Air Circulation
The moment green shoots break the surface, their environmental needs transform:
- Immediate Light Exposure: As soon as the first sprouts emerge, place the tray under full-spectrum LED grow lights positioned 12 to 18 inches above the tray. Run lights on a 14 to 16 hour daily schedule. If seedlings do not receive bright light within 24 hours of emergence, they stretch rapidly, producing weak stems that collapse easily.
- Preventing Damping-Off: Remove the humidity dome completely once sprouts open their cotyledons (seed leaves). High stagnant humidity around leafy sprouts triggers fungal damping-off.
- Gentle Air Circulation: Run a small oscillating fan on its lowest setting across the nursery area. Air movement strengthens seedling cell walls and keeps foliage dry.
Step 7: Thinning Seedlings and Early Nutrition
Once your seedlings stand about 1.5 inches tall and unfold their first set of true leaves (the leaves that resemble adult foliage, not the rounded seed leaves), select the single healthiest sprout per plug.
- Thinning Without Root Damage: Identify the strongest seedling in each plug. Use sterilized micro-snips or scissors to snip away extra sprouts cleanly at the base. Never pull unwanted seedlings out by hand, as their roots are tangled with the survivor.
- Introducing First Nutrients: Transition from pure water to a mild nutrient solution. Mix a quarter-strength vegetative hydroponic fertilizer formula targeting 200 to 300 ppm (0.4–0.6 EC) at pH 5.8 to 6.2. Pouring full-strength nutrient solution on young seedlings will burn root tips immediately.
Feeding seedlings too much fertilizer early on is a common mistake. To see how overfeeding compares to other early pitfalls, read our breakdown of common hydroponic mistakes beginners make and how to avoid them.
Step 8: Transplanting into Your Active Hydroponic System
Timing your transplant correctly prevents transplant shock and ensures rapid root integration into your main reservoir.
Visual Checklist: Ready for Transplant?
- Seedling stands 2 to 3 inches tall with sturdy stem structure.
- At least one to two sets of true leaves are fully opened.
- Bright white root tips extend at least 1/2 inch outside the bottom or sides of the plug.
How to Transplant Cleanly
- Fill your slotted net cups with a bottom layer of rinsed expanded clay pebbles (hydroton).
- Set the intact starter plug into the center of the cup so the emerging roots dangle freely toward the bottom slits.
- Gently backfill around the plug with more clay pebbles to block light from reaching the root zone, since light penetration triggers algae growth in nutrient reservoirs.
- Position the net cup in your system so bursting bubbles or nutrient film lightly reaches the bottom of the net cup until roots grow down into the main water column.
Summary Checklist for Healthy Seedlings
Successful hydroponic germination requires stable microclimate control: buffered starter plugs, consistent 70–80°F warmth, and immediate light and air movement the moment sprouts emerge. Wait for root tips to poke through the bottom of your plugs and feed at quarter-strength to keep seedlings compact, sturdy, and ready for your active reservoir.
Editor’s Note: Parts of this guide were structured and optimized with the assistance of AI, then thoroughly reviewed, edited and expanded with first-hand growing experience by our author Raymond to ensure practical, real-world accuracy.
Frequently Asked Questions
What is the best medium for germinating hydroponic seeds?
Starter plugs (such as Rapid Rooters), rockwool cubes, and peat pellets are the most reliable mediums. They maintain an optimal air-to-water ratio and transfer directly into net cups without disturbing seedling roots.
Should I add hydroponic fertilizer during seed germination?
No. Seeds contain all the energy reserves needed for initial germination. Feed plain, pH-balanced water (5.5–6.0) until the first set of true leaves opens, then introduce a quarter-strength hydroponic nutrient solution (around 200–300 ppm / 0.4–0.6 EC).
Do germinating hydroponic seeds need a humidity dome?
Yes, a humidity dome helps maintain 70–80% relative humidity and prevents the top of your germination plugs from drying out. Remove or vent the dome immediately once seedlings emerge to prevent fungal damping-off.
How do I know when a seedling is ready to transplant into a hydroponic system?
Seedlings are ready to move into Deep Water Culture (DWC), Kratky, or NFT systems when they are 2 to 3 inches tall, have at least one set of true leaves, and show healthy white roots poking through the bottom or sides of the plug.
Why do my hydroponic seedlings get tall, leggy, and fall over?
Leggy seedlings are caused by insufficient light intensity right after emergence. Make sure your LED grow lights are turned on for 14 to 16 hours daily and positioned 12 to 18 inches above the tray the day sprouts break through the medium.
Our Amazon Storefront
Browse all our recommended tools & supplies
Everything we personally use and trust, hand-picked for gardeners like you.
I've been running DWC and Kratky systems for several years and write about what actually works, not textbook theory. Follow along for honest product reviews, practical guides and real grow results.