As an Amazon Associate, I earn from qualifying purchases. Some links in this article are affiliate links, if you buy through them I may earn a small commission at no extra cost to you.
Quick Summary
- Drip System Basics: Deliver nutrient solution directly to individual plant bases via small tubing.
- System Choice: Choose between recovery (recirculating) and non-recovery (run-to-waste) configurations.
- Water Pump: Size your pump based on the number of drip emitters and tubing friction loss.
- Growing Medium: Use clay pebbles (LECA) or rockwool to ensure fast drainage around roots.
- Timer Cycles: Program multiple short watering runs (1-5 minutes) throughout the day to avoid over-saturation.
I’ve been running a 12-site drip setup for three years, and the mistake I see beginners make most often is building a system without knowing which type they built. Before tools and steps, that distinction is worth two minutes of your time.
Recovery vs. Non-Recovery: Choose Before You Build
All drip systems work the same way at the plant end, a pump pushes nutrient solution through tubing, emitters deliver it to each plant site, and gravity carries the excess away. The difference is what happens to that runoff.
Recovery (recirculating) systems collect the runoff and return it to the reservoir. This is efficient, water and nutrients go further, but the solution’s EC will gradually climb as plants drink water and leave some minerals behind. You’ll need to monitor and dilute periodically.
Non-recovery systems let the runoff drain to waste. Simpler to manage, but you’ll use more solution overall. They’re common with coco coir, which benefits from the fresh nutrient charge each cycle delivers.
For most beginners starting with clay pebbles and 6–8 plant sites, a recovery system is the better starting point. That’s what this guide covers.

Step 1: Gather Your Supplies
You’ll need a reservoir, pump, drip lines, emitters, a timer, growing medium, and meters. Here’s what to look for with each:
- Reservoir: Use a dark, opaque container, any light exposure triggers algae. A 18-gallon storage bin View on Amazon is a practical starting size for 6–8 plants; the opaque walls do double duty blocking light.
- Submersible water pump: Sized to your plant count and reservoir volume. We use a VIVOSUN Submersible Pump View on Amazon — see our pump selection guide for specifics on sizing.
- Drip lines and emitters: Adjustable emitters View on Amazon range from 0.5 to 2 GPH. Start at the low end for seedlings and move up as plants grow. One emitter per plant site. Drip lines. View on Amazon
- Timer: A digital outlet timer lets you program multiple on/off cycles per day. A programmable outlet timer View on Amazon with 6 cycles per day covers most schedules.
- Net pots and growing medium: LECA clay pebbles View on Amazon are reusable, pH-neutral, and drain well, a good default for recovery systems.
- Nutrient solution: A two- or three-part hydroponic nutrient formula View on Amazon mixed per the manufacturer’s instructions. I’ve used General Hydroponics Flora series for three years without issues.
- pH and EC meters: Essential, not optional. A combo pH/EC meter View on Amazon saves bench space and runs under $30 for a usable unit.
Related: 10 Must-Have Tools for a Successful Hydroponic Garden, A breakdown of the net pots, air stones, and timers that make running your system day-to-day much easier.
Step 2: Prepare the Reservoir
- Fill the reservoir: Add clean water, enough volume for your plant count. If you’re on municipal tap water, leave it uncovered for 24–48 hours first to off-gas chlorine before mixing in nutrients.
- Add nutrients: Mix the hydroponic nutrient solution according to the manufacturer’s instructions. Start conservative; you can always add more, but you can’t take it back.
- Check pH and EC: Adjust pH to 5.5–6.5 using pH up or down solution. Verify EC is in range for your crop, lettuce targets 0.8–1.2 mS/cm; tomatoes 2.0–3.5 mS/cm.
Related: Understanding Hydroponic pH Levels and How to Manage Them, A deep dive into adjusting your pH balance and recognizing early signs of nutrient lockout.
Step 3: Install the Water Pump
- Position the pump: Place the submersible pump at the bottom of the reservoir. Elevating it slightly on a small platform keeps it clear of any sediment that settles over time.
- Attach the main tubing: Connect the main line to the pump outlet and run it out of the reservoir toward your grow area.
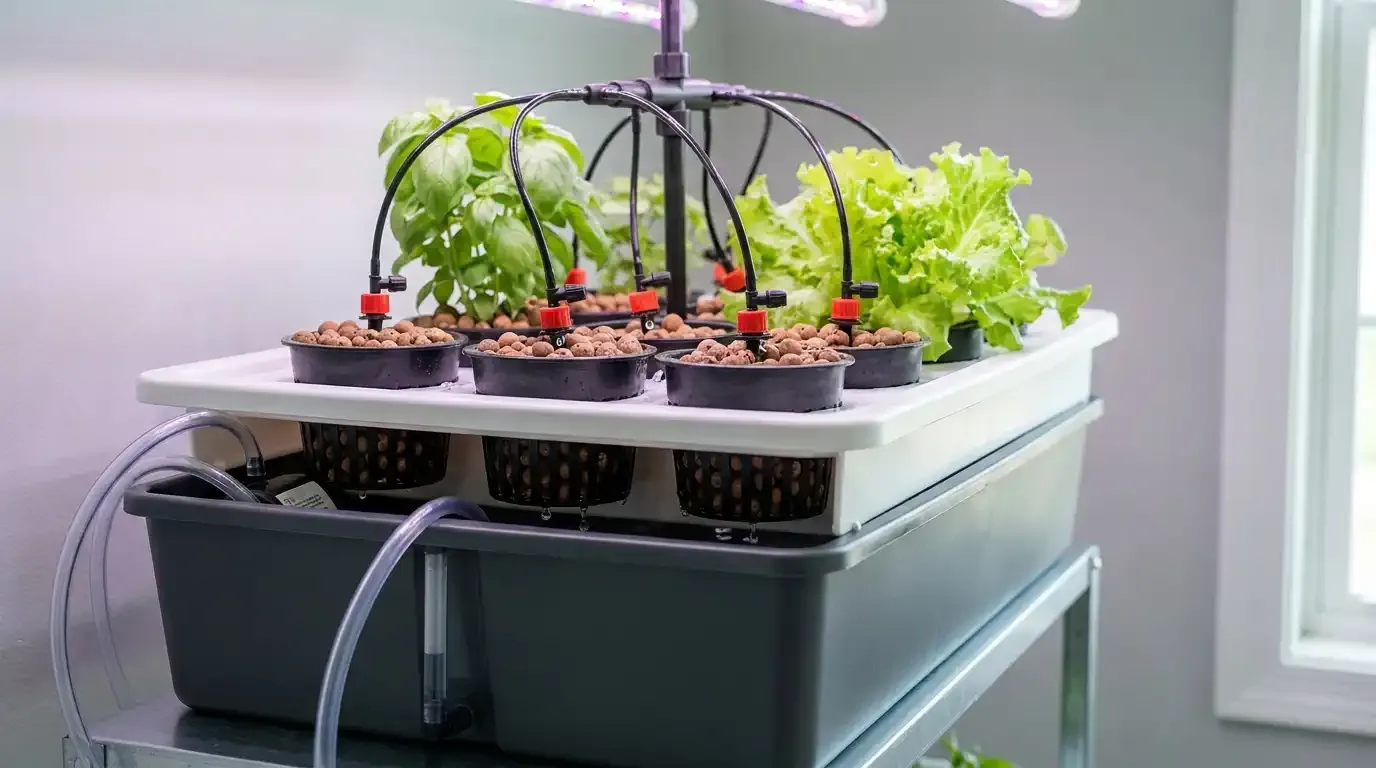
Step 4: Set Up the Drip Lines and Emitters
Run the main tubing from the reservoir to your plant area, then branch off individual drip lines to each site using T-connectors or a manifold.
Insert one adjustable emitter at the end of each drip line, positioned to deliver solution to the growing medium near the plant base. Emitters typically range from 0.5 to 2 GPH, start at the low end for seedlings and increase as plants grow. A fruiting tomato can need two to three times the flow rate of a young lettuce plant.
Before placing your plants, run a full pump cycle and confirm that each emitter delivers a consistent, steady drip. Uneven flow is much easier to correct now than after plants are established.
Step 5: Position the Net Pots and Growing Medium
Set net pots in your grow tray holes and fill with your chosen medium:
- LECA (clay pebbles): Reusable, pH-neutral, and drains well, the default choice for recovery drip systems.
- Coco coir: Holds more moisture than LECA; pair it with shorter, more frequent drip cycles to avoid waterlogging. Rinse and pre-wet before use.
- Perlite mix: Lightweight; often combined 70/30 with coco coir for better drainage and aeration.
Avoid vermiculite in a drip system. It retains too much moisture and breaks down over time, shedding fine particles that block emitters.
Step 6: Set Up the Timer and Start the System
Timer scheduling is one of the most consequential settings in a drip system, get it wrong and plants either dry out between cycles or sit in waterlogged medium that suffocates roots.
For a recovery system with LECA, start with 15 minutes on, every 3–4 hours, four to six cycles during the light period. For coco coir, which retains moisture longer, try shorter cycles of 5–10 minutes every 1–2 hours. In both cases, the goal is to keep the medium moist between cycles without saturating it.
Power the system on and observe a full cycle from start to finish. Confirm the pump starts cleanly, every emitter activates, and the drain channels solution back to the reservoir without overflow or pooling.
Step 7: Monitor and Adjust
The first week tells you what needs tuning. Check these daily:
- Flow rate: Each plant site should receive a consistent drip. Any site that looks dry between cycles may need a higher-flow emitter or more frequent scheduling.
- Reservoir level: Top up with plain, pH-adjusted water when the level drops, not fresh nutrient solution. Plain water prevents EC from climbing too quickly as plants drink.
- pH: Check every 1–2 days. A reading outside 5.5–6.5 means certain nutrients are chemically unavailable to plants even if they’re dissolved in the solution.
- EC: Check every 2–3 days. If EC rises, dilute with plain water. If it drops, add more nutrient solution.
Healthy roots are white or pale cream. Brown, mushy, foul-smelling roots indicate rot, usually caused by waterlogged medium, poor drainage, or solution temperatures above 75°F (24°C).
Troubleshooting Tips
- Uneven drips: Check for partial blockages. Remove affected emitters and soak in diluted hydrogen peroxide solution for 30 minutes before reinstalling.
- Algae in reservoir: Cover every light gap, including around lids and where tubing enters. Even a pinhole is enough. Use opaque tubing throughout.
- Clogged emitters: Flush the entire system with clean, pH-adjusted water between crops. Mineral buildup is fastest when pH swings are frequent, which is another reason to check pH regularly.
Your First Week: What to Look For
After seven days, if you see steady new growth, white roots, and a consistent drip from every emitter, your baseline schedule is working. From here, adjust one variable at a time.
If leaf edges are turning brown or crispy, check EC before changing nutrients, tip burn in leafy greens is almost always elevated EC, not calcium deficiency. If growth seems slow, verify light schedule and pH before adjusting your feeding programme. If emitters start running unevenly, flush and inspect for early mineral deposits before they become full blockages.
A well-tuned drip system is forgiving once the baseline is dialled in. It handles a wide range of plants and scales from a small herb setup to a full grow tent without changing the fundamental approach.
Frequently Asked Questions
What plants grow best in a drip system?
Tomatoes, peppers, cucumbers, and herbs all do well in a drip system. Leafy greens like lettuce and spinach work too, though they grow fine in simpler passive systems. Fruiting plants benefit most, the ability to dial in feeding schedules through vegetative and flowering stages gives you precise control at each growth phase.
How long do you run a hydroponic drip system?
For a recovery system using clay pebbles (LECA), a common starting schedule is 15 minutes on, every 3–4 hours, roughly 4–6 cycles during the light period. For coco coir, which holds more moisture, try shorter cycles of 5–10 minutes every 1–2 hours. Adjust based on how quickly your medium dries between cycles; the goal is to keep roots moist but not waterlogged.
What are the disadvantages of drip irrigation in hydroponics?
Drip systems require more setup than passive methods like Kratky. Emitters can clog, especially if pH swings cause mineral precipitation in the lines. Recovery systems also require regular EC monitoring, as plants drink water and leave some minerals behind, EC rises over time and must be diluted periodically.
What is the difference between drip irrigation and hydroponics?
Traditional drip irrigation delivers water to soil-grown plants. In a hydroponic drip system, a precisely formulated nutrient solution is delivered to plants growing in an inert medium like clay pebbles or coco coir, no soil involved. The plants get everything they need directly from the water itself.
What is the easiest hydroponic system to use?
The Kratky method is generally considered the simplest, no pumps, no timers, just a reservoir and a net pot. Drip systems are more complex, but offer much greater control and scale well beyond what passive systems can handle, especially for larger fruiting plants like tomatoes.
Our Amazon Storefront
Browse all our recommended tools & supplies
Everything we personally use and trust — hand-picked for gardeners like you.

I've been running DWC and Kratky systems for several years and write about what actually works, not textbook theory. Follow along for honest product reviews, practical guides, and real grow results.